How To String A Badminton Racket: Step by Step Guide
If you’ve ever found yourself wondering, “How in the world do I string a badminton racket?” you’re in the right place. Let’s unravel this tangled mystery together. You see, string tension is kind of like the secret sauce of badminton. Get it just right, and you’ll be smashing and slicing like you were born with a racket in your hand.
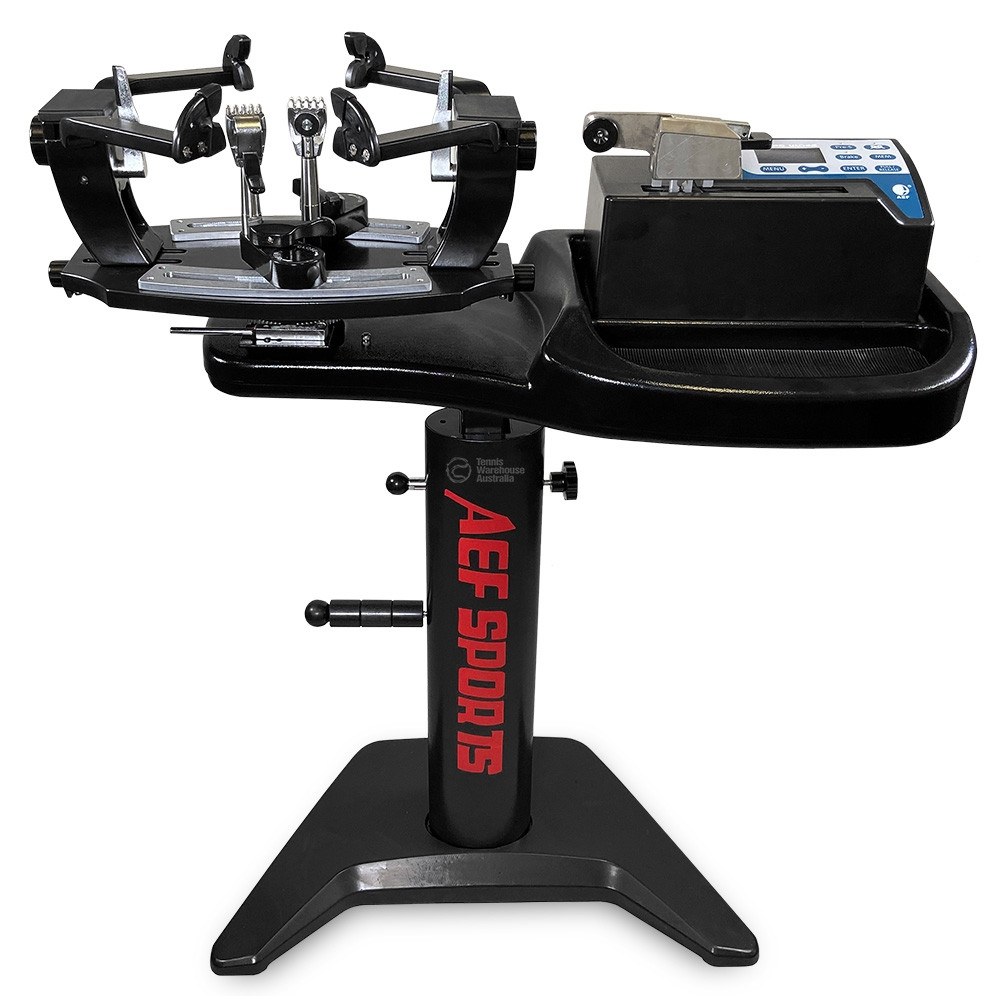
Oh, and if you’ve ever thought about using a badminton restring machine but were slightly intimidated (or just lazy like me!), don’t fret. We’ll be exploring that as well. Trust me, it’s a whole lot easier than assembling Ikea furniture. And thankfully, no tiny Allen wrenches are required.
So, buckle up, friends. We’re about to journey into the nitty-gritty world of string tension. By the end of this guide, not only will you be a master of the art, but you might even get a laugh or two out of my struggles and misadventures along the way.
How to String a Badminton Racket
Alright, folks, let’s get down to the brass tacks – how to string a badminton racket. It might seem daunting at first, but remember, every pro was once a novice, and I’m here to walk you through every step of the way. So, grab your badminton racket, your string, and let’s get to it.
Step 1: Prepare your Racket and String
First, you’ll need to remove the old string from your racket. Be careful while doing this to avoid damaging the frame. Next, measure out the new string. As a rule of thumb, I use about 10 meters (or 33 feet) of string for one racket.
Step 2: Mount the Racket
Secure your racket onto the stringing machine. The frame should be firm, but not overly tightened to avoid warping the shape. Remember, it’s not going anywhere – it just needs to stay put while you work your magic.

Step 3: Starting the Mains
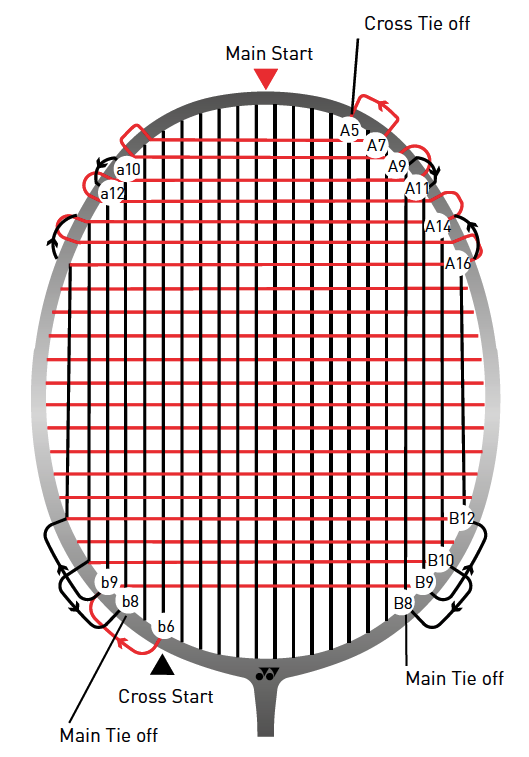
The “mains” are the vertical strings that run the length of the racket. To start, thread the string through the top two grommets (those are the little holes in your racket) and secure one end to your stringing machine. The other end will be used to weave the mains.
Step 4: Stringing the Mains
Weave the string down through the grommets on alternating sides of the racket. The pattern will differ based on your racket, so it’s important to follow the manufacturer’s guide. When you’re halfway through, you’ll need to release the string from the clamp, pull the string taut, and re-clamp it before continuing.
Step 5: Stringing the Crosses
Once the mains are done, you’ll move onto the “crosses” – the horizontal strings that cross the mains. Thread the string through the top grommet and secure the string to the machine. Weave the string horizontally, over and under the mains, alternating with each row.
Step 6: Tying Off
After all the crosses are done, you’ll need to tie off the string. Thread the end of the string through a grommet, and tie a secure knot. Trim any excess string, but leave a little tail for adjustments.
Step 7: Unmount the Racket
Carefully unmount the racket from the stringing machine. And voila! You’ve just strung your first badminton racket.
Bear in mind that each racket and string might require some specific steps, so always refer to the manufacturer’s instructions. And remember, practice makes perfect. The more you string, the more efficient and precise you’ll become. So, don’t worry if your first few attempts take a bit longer or don’t turn out perfectly.
My journey into learning how to string a badminton racket was filled with trial and error, a few minor mishaps (let’s not talk about the time I snapped a string), but ultimately, a whole lot of fun and satisfaction. I hope yours will be, too!

How long does it take to string a badminton racket?
First off, let’s chat about “How long does it take to string a badminton racket?” Here’s where the story gets interesting. If you’re a beginner, like I was not too long ago, you might spend between 60 to 90 minutes on this task. Yes, you heard that right. But before you decide to run off into the sunset, let me assure you it gets better with time.
With a good badminton restring machine and some practice, you can cut this down to 30-45 minutes. And for the seasoned pros out there, they can have a racket strung in about 20 minutes flat. Yes, seriously!

The first time I tried stringing my racket, I felt like I was defusing a bomb, gingerly threading each string, terrified I’d snap it. But trust me when I tell you, it’s a skill, and like any other, it can be honed with practice.
So, let’s explore how to string a badminton racket efficiently. And remember, we’re not in a race here. Quality over speed, always. The goal isn’t to finish first; it’s to get a perfectly strung racket that will have you playing like a champ. So, grab your badminton restring machine, your favourite string, and your patience. Let’s dive in!
How much does it cost to string a badminton racket?
Moving on to our next question, “How much does it cost to string a badminton racket?” Well, that depends on a few factors. If you’re looking to have it done professionally, it can range from $15 to $30, depending on where you live and the type of string you choose. However, I’m a firm believer in the old saying, “Give a man a fish, and you feed him for a day; teach a man to fish, and you feed him for a lifetime.”
With a badminton racket string repair kit, you can take this task into your own hands. For a one-time investment of about $50 to $150, you can get a decent kit. And if you play badminton as much as I do (which is, let’s be honest, any chance I get), the kit pays for itself after a few uses.
Learning how to string a badminton racket not only saves you money, but it also gives you complete control over your racket’s performance. Plus, there’s a certain satisfaction in knowing you did it yourself.
So, let’s get our hands dirty, shall we? Together, we’re going to explore how to string a badminton racket at home, making our own customized, cost-effective solution. As the pros say, when you customize your racket, you customize your game!
Final Thoughts
So, we’ve walked through the process of how to string a badminton racket. It’s a lot to take in, isn’t it? You’re probably sitting there, old string in one hand, new string in the other, looking at your racket and wondering, “Did I bite off more than I can chew?”
I’m here to tell you, you haven’t. Remember when I said string tension is the secret sauce of badminton? Now that you know how to string your racket, you have the power to manipulate that tension to your advantage.
The badminton racket string tension is not just about how tight or loose the strings are. It’s about how you want to play your game. Higher tension gives you more control and accuracy, while lower tension offers more power.
This isn’t something you can customize when you get your racket restrung professionally. But now, you have the chance to experiment, to tweak, to find what works best for you.
Think about how you play. Are you all about those fast, smashing returns, or do you prefer the finesse of a well-placed drop shot? Once you start to understand your own style, you can adjust your string tension to complement it. You’re not just a player now, you’re a racket scientist, experimenting and perfecting your own equipment.
So, the next time you step onto that court, with your freshly strung racket, you’ll not only feel a sense of achievement, but you’ll also have the edge of customization. Remember, in badminton, as in life, it’s the little details that make a big difference. Happy playing, my friends!


